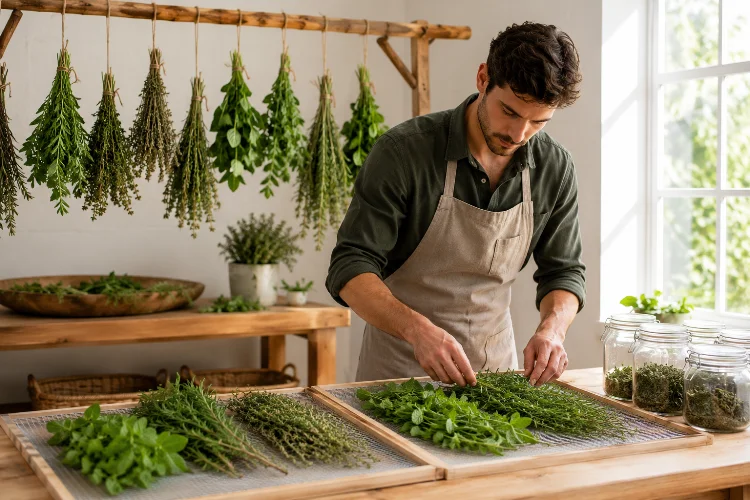
Fresh herbs can be wonderful when they are growing in the garden, but that freshness does not last forever. Basil wilts, mint becomes tired, and a productive rosemary or thyme plant can easily produce more than you can use in a week.
Drying offers a simple solution. Done properly, it removes enough moisture to make herbs easier to store while retaining much of their characteristic aroma, flavour, and colour.
Done badly, however, the result can be brown leaves with very little fragrance-or, worse, herbs that still contain enough moisture to develop mold.
Learning how to dry fresh herbs while preserving quality and colour is therefore about more than hanging a bunch of plants in the kitchen. Harvest timing, temperature, airflow, light exposure, moisture, and storage all influence the finished product.
The good news is that you do not need expensive equipment. Air drying works well for many herbs, while a food dehydrator gives you more control when you need faster, predictable results.
Start With Herbs at Their Best
Good dried herbs begin with good fresh material.
The National Center for Home Food Preservation recommends harvesting many herbs shortly before their flowers first open, when plants are at the budding stage. Harvesting in the morning after dew has evaporated can also help minimize wilting.
Choose healthy leaves and stems without obvious disease, heavy insect damage, or decay. Damaged and discoloured material will not magically improve during drying.
Handle the leaves gently as well. Crushing them releases aromatic compounds earlier than necessary, which is not ideal when your goal is to preserve flavour for later use.
If you grow your own herbs, try drying relatively small batches at first. You will quickly learn whether basil, oregano, rosemary, sage, thyme, mint, or another herb responds best to your chosen method.
Wash and Remove Surface Moisture Carefully
Freshly harvested herbs may carry soil, dust, insects, or other debris.
For herbs that need cleaning, rinse them gently under cool running water rather than soaking them for long periods.
The National Center for Home Food Preservation recommends rinsing herbs in cool water, gently shaking away excess moisture, and removing damaged or dirty material before drying.
The important next step is getting rid of surface water.
Shake the herbs gently, then pat them dry with clean paper towels or allow them to drain briefly. Putting dripping-wet herbs directly into bundles slows the drying process and creates conditions where excess moisture may remain trapped.
Do not leave freshly harvested herbs sitting in strong sunlight while preparing them. Sun drying is generally not recommended for herbs because exposure can reduce colour and flavour quality.
Once the leaves are clean and reasonably dry, move straight into your chosen preservation method.
Air Dry Sturdy Herbs in Small Bundles
Air drying is probably the image most people associate with traditional herb preservation: small bundles hanging upside down in a dry room.
It works particularly well with relatively sturdy, lower-moisture herbs. The National Center for Home Food Preservation identifies rosemary, sage, thyme, summer savory, and parsley among herbs that can be air-dried relatively easily.
Keep the bundles small.
University of Minnesota Extension recommends gathering roughly four or five stems per bundle and hanging them in a dark, dry, well-ventilated location. Larger bundles can restrict airflow and make even drying more difficult.
A dark room is preferable to a sunny window. Light may look attractive in photographs, but protecting herbs from direct light helps maintain quality.
Depending on conditions, air drying can take around 7–14 days. Temperature, humidity, herb type, stem thickness, and air circulaton all influence the actual time.
Do not package herbs simply because the outside leaves look dry. Check the entire bundle first.
Dry Tender Herbs More Quickly
Not every herb behaves like rosemary.
Basil, mint, oregano, tarragon, and lemon balm contain relatively high amounts of moisture and can develop mold if they dry too slowly. The National Center for Home Food Preservation specifically advises greater care with these tender-leaf herbs.
One option is to place small hanging bundles inside paper bags with holes punched into the sides. The bag helps protect the herbs while allowing moving air to carry moisture away.
Keep the bundles loose rather than stuffing large amounts of foliage into one bag.
You can also remove individual leaves and spread them in a single layer. Keeping leaves seperate improves exposure to moving air and reduces pockets where moisture might remain trapped.
In humid climates, natural air drying can be frustratingly slow. That is where a food dehydrator becomes particularly useful because both temperature and airflow can be controlled.
Use a Dehydrator for Better Control
A food dehydrator is one of the easiest ways to produce consistently dried herbs.
For herbs, the National Center for Home Food Preservation recommends temperatures around 95°F to 115°F (35°C to 46°C), with temperatures up to about 125°F sometimes needed in more humid environments. Herbs should be placed in a single layer so air can circulate around them.
University of Minnesota Extension gives similar guidance, recommending approximately 95°F to 115°F and noting that dehydration may take roughly two to six hours depending on conditions and the herb.
Avoid the temptation to turn the heat up dramatically just to finish sooner.
Oregon State University Extension cautions that excessively high drying temperatures can cause flavour loss.
Low, controlled heat combined with good airflow removes moisture without effectively cooking the leaves.
Check the herbs periodically rather than assuming every tray will finish at exactly the same time.
Protect Colour by Controlling Heat and Light
Bright green dried basil or mint looks appealing, but preserving colour is not simply cosmetic.
Colour changes can be a sign that the herb has experienced excessive heat, sunlight, or prolonged drying conditions. That is why drying recommendations repeatedly emphasize moderate temperatures and protection from direct light.
The National Center for Home Food Preservation states that herbs generally retain better colour and flavour when dried indoors rather than outdoors. It also recommends storing finished herbs in a dark location to protect colour and fragrance.
Think of light, heat, air, and moisture as four factors you are trying to manage.
A hot windowsill may dry herbs eventually, but strong sunlight can work against the quality you are trying to preserve. A shady but humid cupboard can create the opposite problem by drying too slowly.
The ideal environment is dry, moderately warm, protected from strong light, and supplied with good airflow.
That simple combination often matters more than purchasing complicated preservng equipment.
Know When the Herbs Are Completely Dry
Guessing whether herbs are dry enough can cause storage problems later.
Properly dried leaves should feel crisp and crumble easily between your fingers. Stems should break rather than bend softly.
If leaves still feel cool, flexible, or leathery, give them additional drying time.
This step matters because remaining moisture can encourage deterioration during storage. Dried foods can also reabsorb moisture from the surrounding environment if they are poorly packaged.
Allow dehydrator-dried herbs to cool completely before putting them into containers. Packaging food while it is still warm can create condensation inside the container, which adds moisture back into something you just spent hours drying.
When unsure, wait a little longer and check again.
Drying should remove moisture—not merely make the outside of the leaf feel dry.
Store Dried Herbs Whole When Possible
Once herbs are completely dry, resist the urge to immediately grind everything into powder.
Oregon State University explains that much of an herb’s flavour comes from oils within plant cells; chopping or grinding breaks those cells and releases flavour.
Keeping dried leaves relatively whole until you need them can therefore help protect their aroma.
Place the herbs in clean, dry, airtight containers. Glass jars with tight-fitting lids work particularly well because you can easily see the contents and notice unexpected moisture.
Store the containers somewhere cool, dry, and dark.
Both the National Center for Home Food Preservation and Oregon State University recommend these conditions for preserving dried-herb quality. Properly dried herbs may maintain useful quality for up to about a year, although aroma gradually declines over time.
Label every container with the herb name and drying date. Surprisingly, several dried green leaves can look almost identical after a few months.
Avoid the Most Common Drying Mistakes
Most disappointing batches of dried herbs fail for fairly simple reasons.
Oversized bundles restrict airflow. Wet leaves take longer to dry. Strong sunlight can reduce colour and flavour. Excessive dehydrator temperatures may damage aroma, while packaging herbs before they are fully dry creates unnecessary moisture problems.
Another mistake is repeatedly opening a storage container.
Every time dried food is exposed to humid air, it has another opportunity to absorb moisture. The National Center for Home Food Preservation recommends packaging dried foods in quantities that can be used conveniently without constantly reopening a large supply.
If you notice condensation inside a jar, investigate immediately. Moisture is a warning that the product may not have been sufficiently dry or has absorbed humidity.
And always discard dried material that develops visible mold or a clearly abnormal smell.
Your goal is not simply long storage. It is maintaining safe, useful herbs with good colour and fragance.
Drying fresh herbs successfully comes down to controlling a few basic factors: moisture, temperature, airflow, and light. Harvest good-quality herbs, clean them carefully, remove surface water, and choose a drying method that suits the plant.
Sturdy herbs such as rosemary, sage, and thyme often air-dry well, while moisture-rich basil and mint may benefit from faster drying or a dehydrator. Keep temperatures moderate, allow plenty of airflow, and wait until leaves crumble easily before storage.
Once dry, place your herbs in airtight containers somewhere cool, dark, and dry.
The next time your garden produces more herbs than you can use fresh, do not let them wilt away. Dry a small batch, label it, and compare its colour and aroma with store-bought herbs-you may be surprised by the difference.